Hello there,
In this article, we will guide you how to set up the booking ticket system with AmyMovie theme. Please follow the steps below
Step 1: Activate the necessary plugins #
After installing and activating AmyMovie theme, please install the plugins below to use for the book ticket website
- Amy Movie Extends
- One Click Demo Import
- Widget Importer & Exporter
- WordPress Importer
- Woocommerce
- Seat Reservation for WordPress and WooCommerce
- Elementor or WPBakery Page Builder
Step 2: Enable the Book Ticket System at Movie Settings #
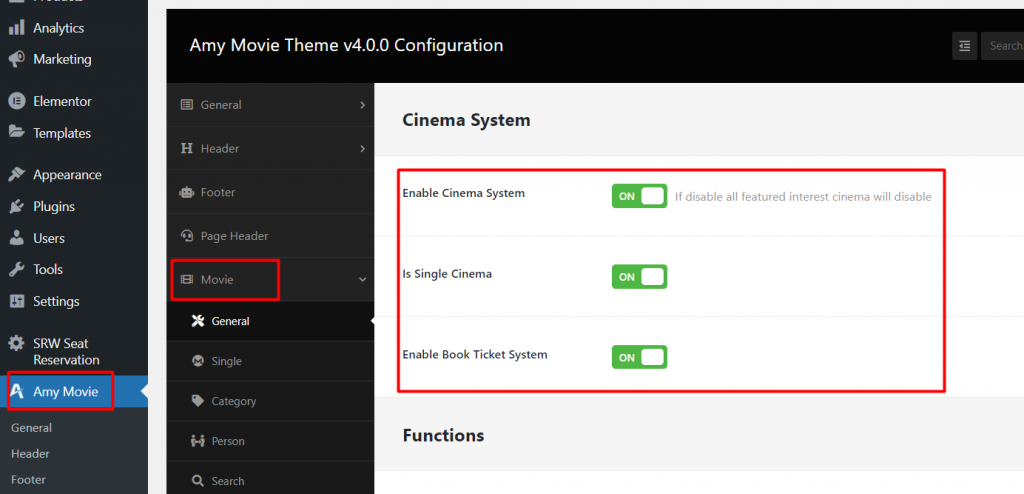
From Dashboard => AmyMovie => Movie => General tab
- Turn on the Enable Cinema System
- Turn on Is Single Cinema button if your website have only 1 cinema
- Turn on Enable Book Ticket System to use the booking ticket feature
After that, click on Save button to save your changes
Step 3: Create cinema profile and showing time and seats #
From Dashboard => SRW Seat Reservation
3.1. Firstly, tick on this configurations

Enter the name at Create Profile field => then click on Add button
After that, please add types of seat and choose color for each seat type
Then at the Schedule section, you can add the time and date
After that, at Schedule section, please enter the columns and rows => click on Save button to make the seat mapping
After all, please choose the type for each seat at seat mapping and click on Save Mapping button

Step 4: Create new products to add Seat reservation #
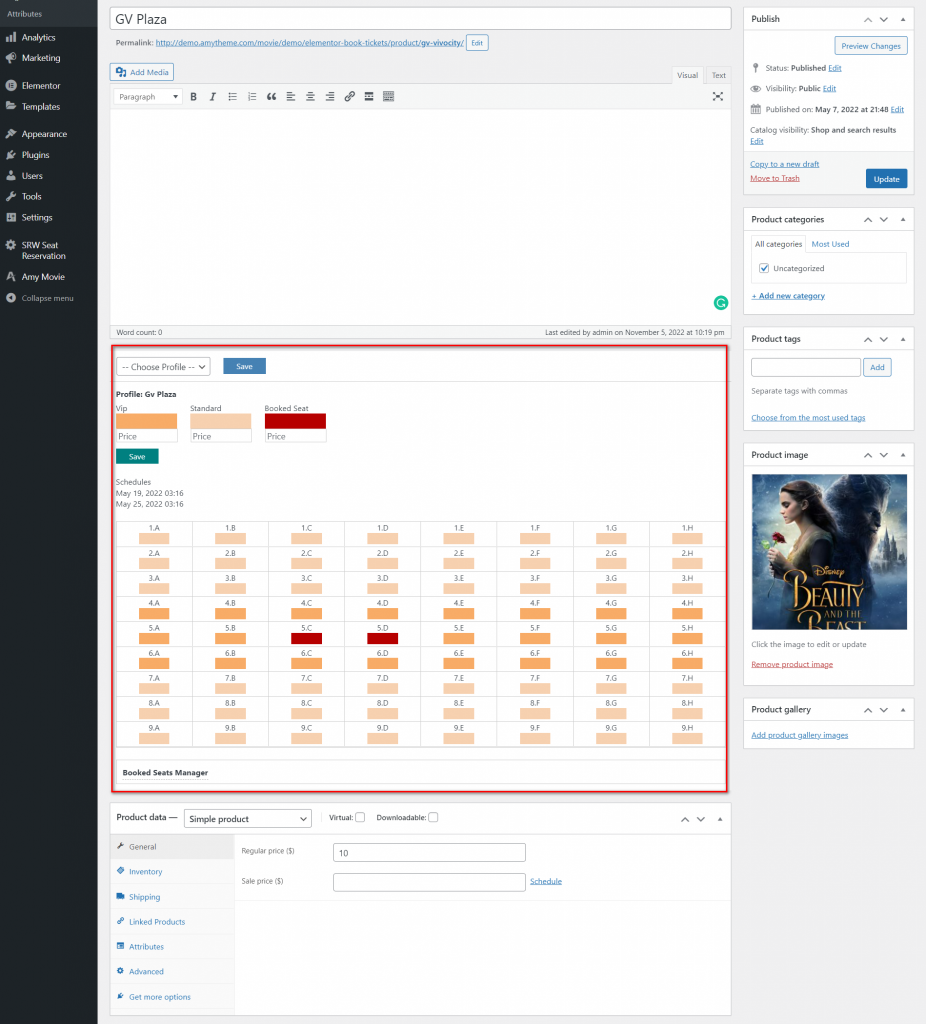
From Dashboard => Products => Add New => click on Publish button then choose the Profile for that product
Step 5: Insert the products to the movie #
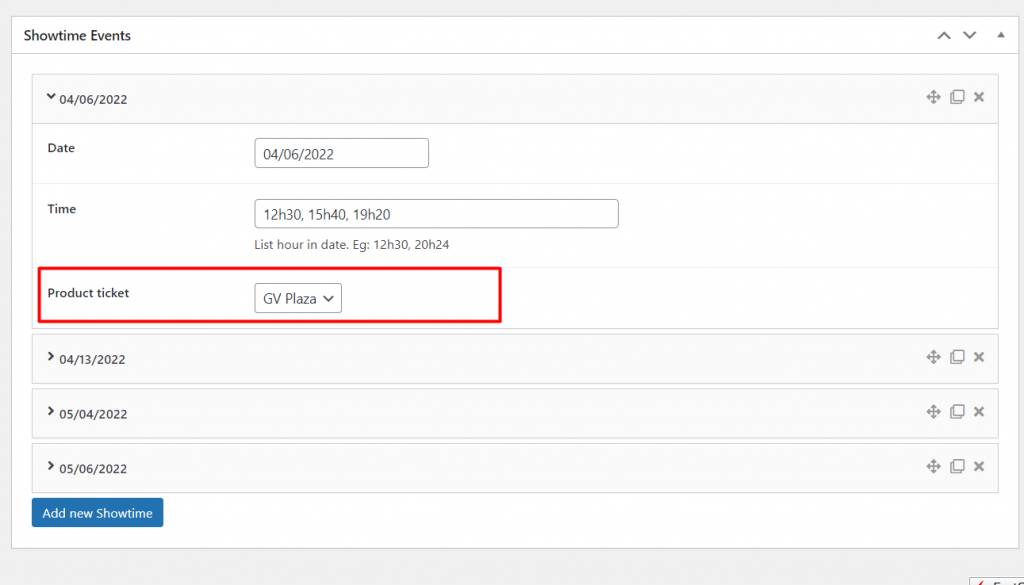
From Dashboard => Movie => open the movie that you want to add products to
Then at Showtime Events section => please add date and time and choose product ticket
You have just finished the journey to set up the Book Ticket system, you can show the product to the menu as the demo: http://demo.amytheme.com/movie/demo/elementor-book-tickets/product/gv-vivocity/


